Antares (α Scorpii A)
Antares is a Kodak Box Brownie, converted to a pinhole, shooting 620 roll film
- Motivation
- Design
- Gallery
Design
The goal of the conversion was to make the fewest possible changes to the original box Brownie camera. The difficulty of the conversion will vary depending on the particular vintage of the camera acquired. In the case of this Six-20 Brownie, all the key parts of the case were held by friction fit, with crimping of metal where required. This made it relatively easy to disassemble to get access to the relevant areas.
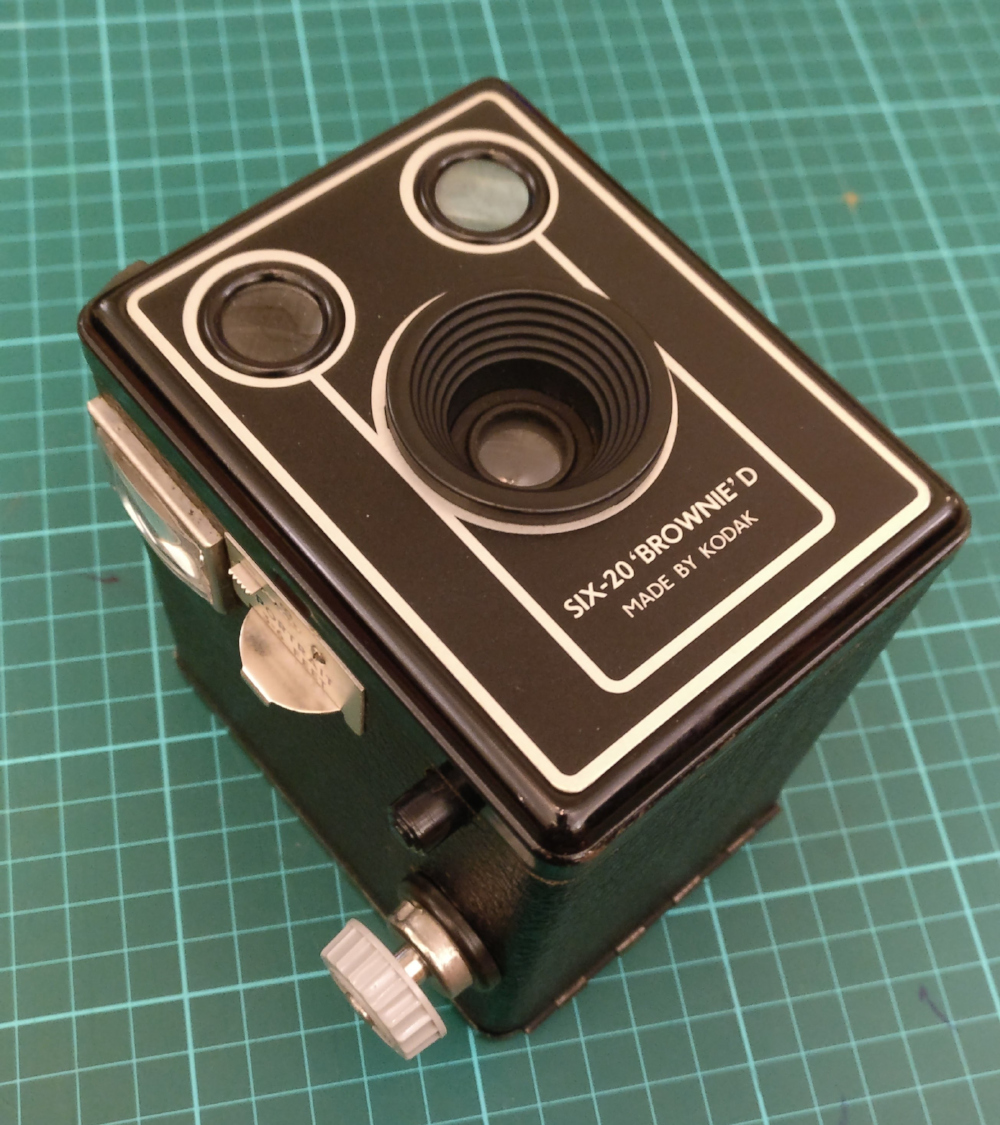
The original unmodified Six-20 Box Brownie
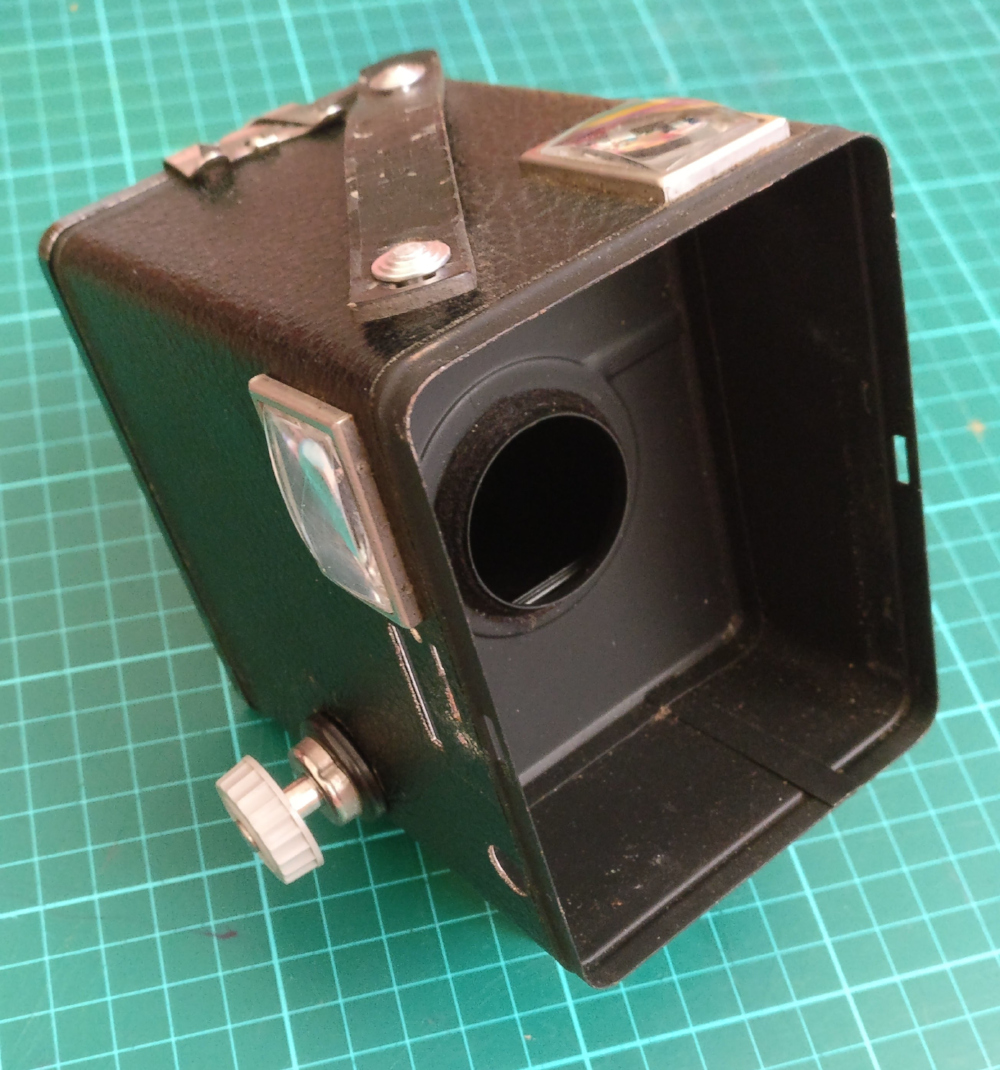
The lens that needs to be replaced with the pinhole is attached to the rear of the face plate, so the first step is to remove the face plate. The face plate has been crimped on either side so that it is held in place merely with a friction fit. Fortunately they did not use glue on this part, so a strong grip was all that was required to free it from the main case. If it doesn’t come free easily enough, a flat head screwdriver or kitchen knife could be useful to pry it loose. With the face plate removed one can see the springs, levers and plates of the shutter mechanism.

The camera after the face plate holding the lens has been removed
As mentioned above, the face plate held the central lens. The two other lens at the top of the face plate are for the view finders. One view finder faces the top for shooting in portrait mode while the other view finder faces the side for shooting in landscape mode. Looking very carefully at the central lens it was possible to see that it had a retaining ring on the front holding it in position in the funnel. This was held in place as a friction fit again, with slight metal crimping.
The removed face plate of the camera, showing the lens and two view finders
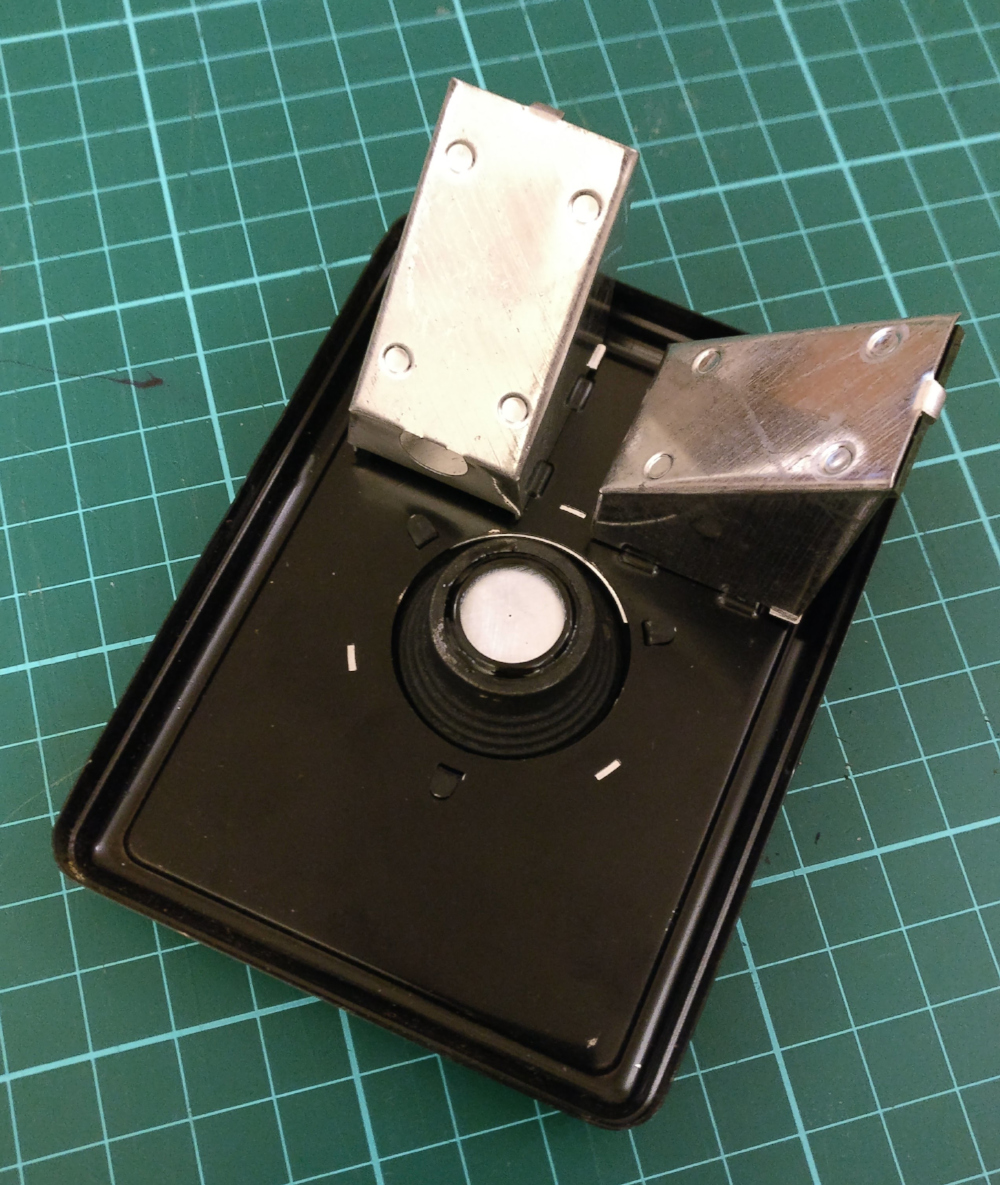
Looking at the face plate from the rear it is possible to see the right angle holders to which the view finder mirrors are attached. This is a good opportunity to clean and polish the mirrors, to produce a bright view finder view. The view finder lens on the main case should also be cleaned at the same time.
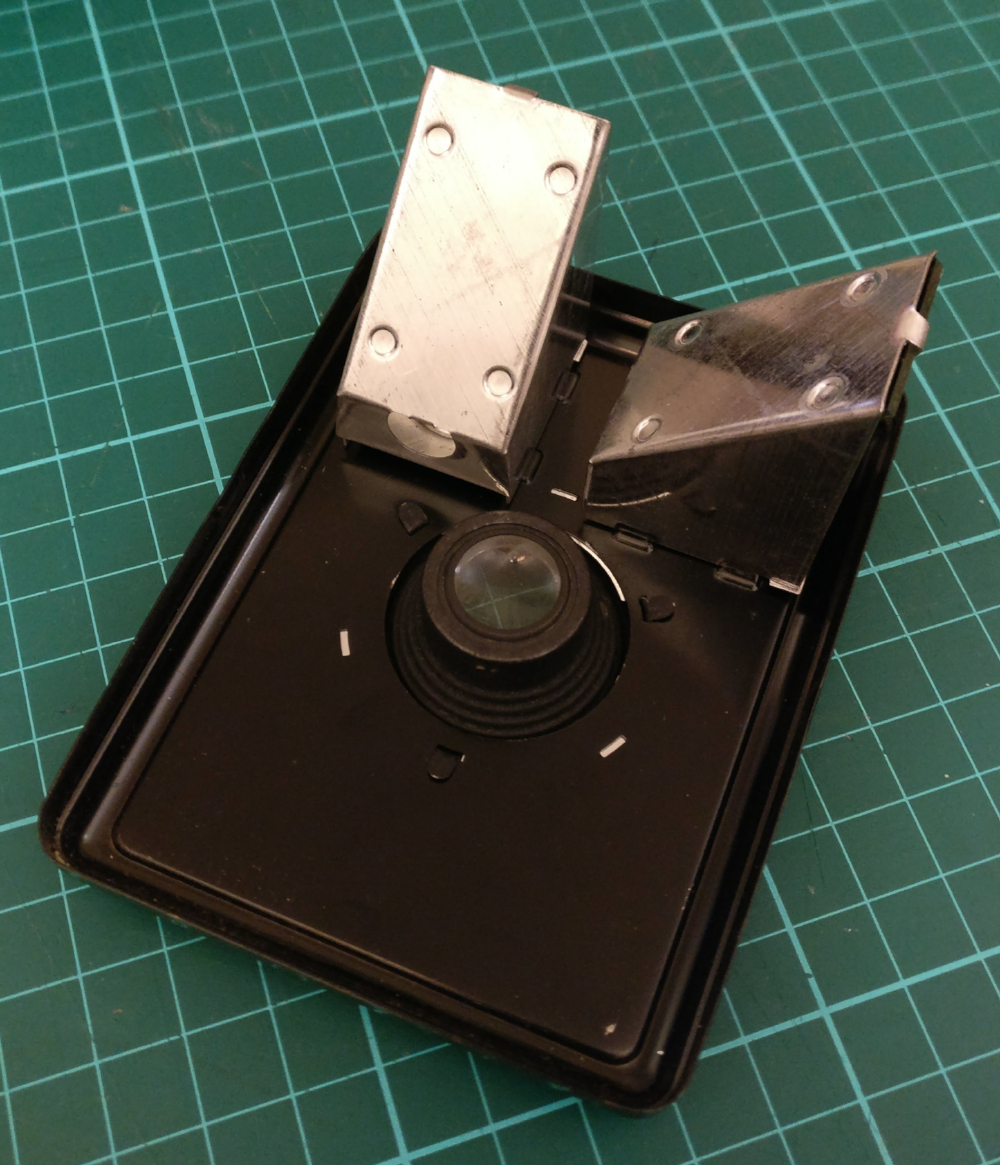
The rear of the face plate showing the lens holder and right angle mirrors for the view finders
Since the retaining ring for the central lens is on the front side of the face plate, the lens can be removed with careful action from the rear side. The handle end of a screw driver was placed on the lens, and a few taps of a hammer caused the retaining ring and lens to pop right out.
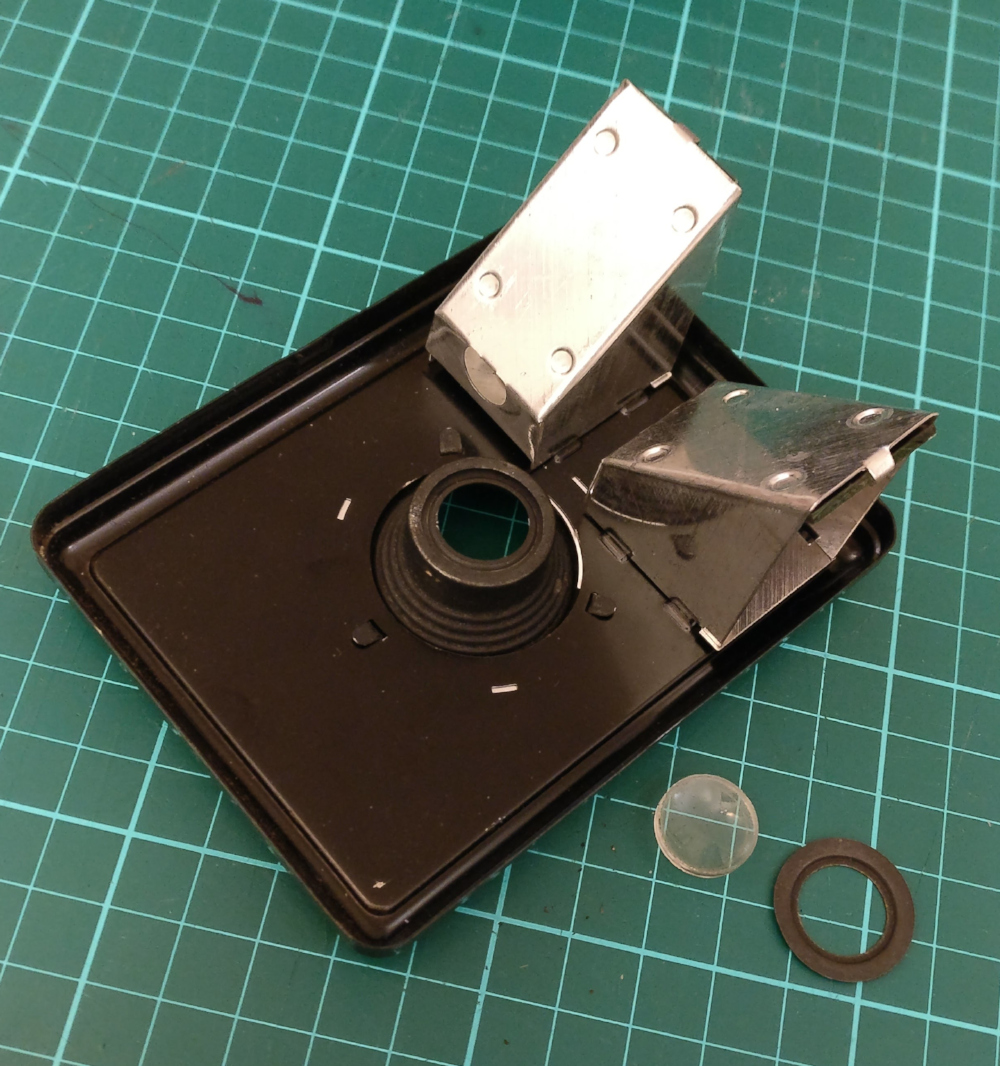
The face plate with the plastic lens and its retaining ring popped out
With the lens removed, it was possible to cut a piece of metal to form the pinhole plate. The metal disc needs to be cut to the same size as the retaining ring. It can put in place of the lens, and the retaining ring clipped back into position. Before fitting it though, a needle is used to make the fine pinhole in the metal plate.
The face plate with a metal disc and pinhole in place of the removed lens
The distance between the pinhole and the film is relatively large, which will mean a relatively narrow field of view and longish exposure times. It can be expected that the exposure times will be longer than can be hand-held even on a sunny day. Most of the box Brownies lack a tripod thread, it only becoming common when Kodak switched to the bakerlite plastic designs. With the face plate removed it was possible to see that there was a moderately sized void between the shutter mechanism assembly and the compartment holding the film. It was thought this might be large enough to permit a tripod fixing nut to be attached in some manner. So the next step was to remove the shutter mechanism assembly. Two small screws on the side of the box hold one side of the assembly and the other side is a friction fit. With the screws removed, the assembly popped right out.
The camera with the shutter mechanism assembly temporarily removed
The shutter mechanism assembly after it has been removed. If it is dirty at all, this is the right time to clean it up. Fortunately this camera was essentially spotless.

The shutter mechanism assembly removed from the camera
From a previous camera build, a bunch of 1/4inch t-nuts were in the toolbox. These are way too long to be directly attached to the box Brownie case, as the would stick through almost 1cm. To deal with this a few pieces of cardboard were glued together to build up enough thickness to contain the t-nut. A 9mm hole was drilled in bottom of the case to give access to the t-nut. The cardboard was glued to the bottom of the case. This just has to strong enough to hold it in position while attaching the tripod plate. When tightened everything is securely held by compression. Through the opening to the film compartment, you can see the sticker warning you to use 620 roll film instead of 120 roll film.
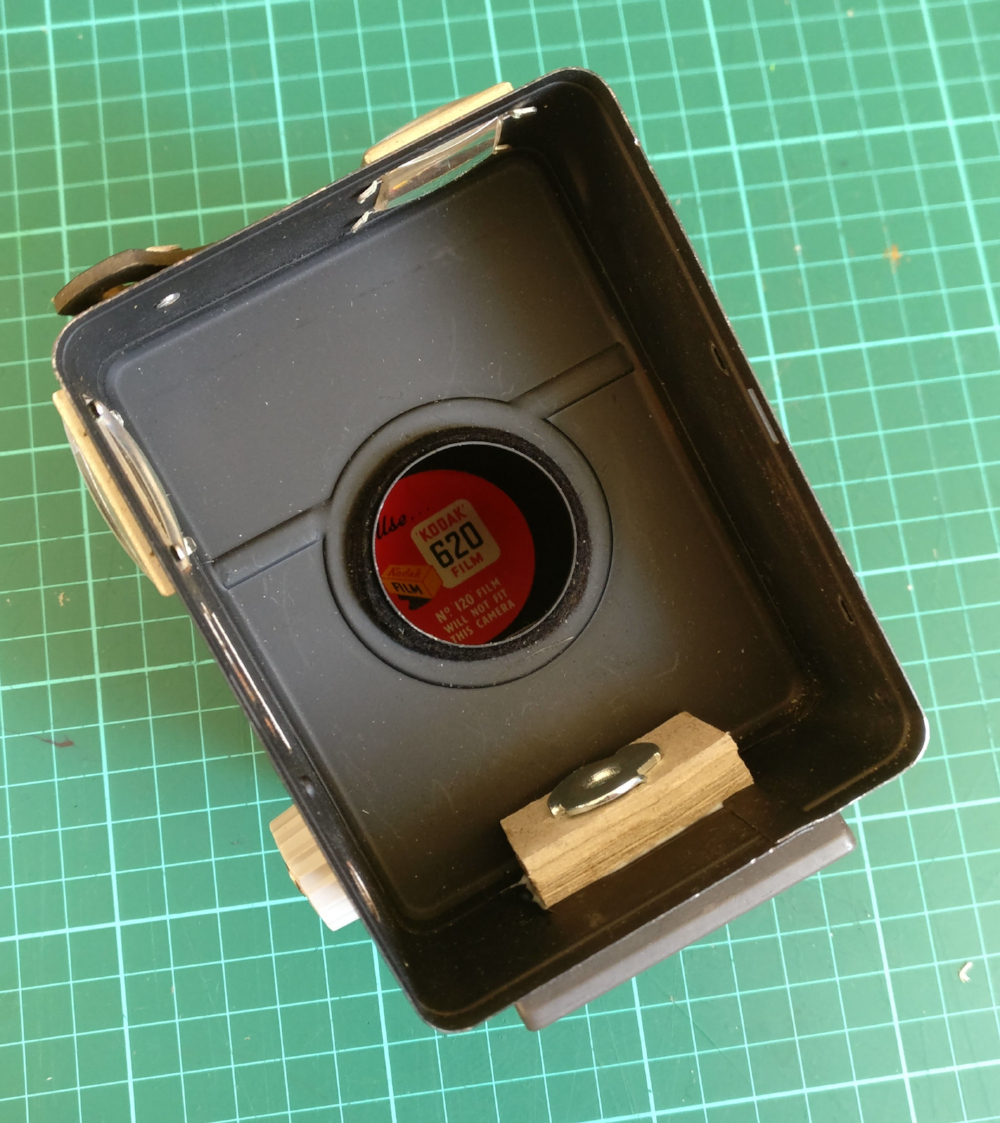
A t-nut with 1/4 in thread fixed to the base to provide a tripod mount
At this point the modifications are complete, so all that remains is to reinsert the shutter mechanism assembly. This was a little tricky to coax into position – it required sticking fingers through the round hole from the film compartment to move it about. After that the face plate can be clipped back on the front of the camera. The Kodak Box Brownie Pinhole is now complete and ready for use
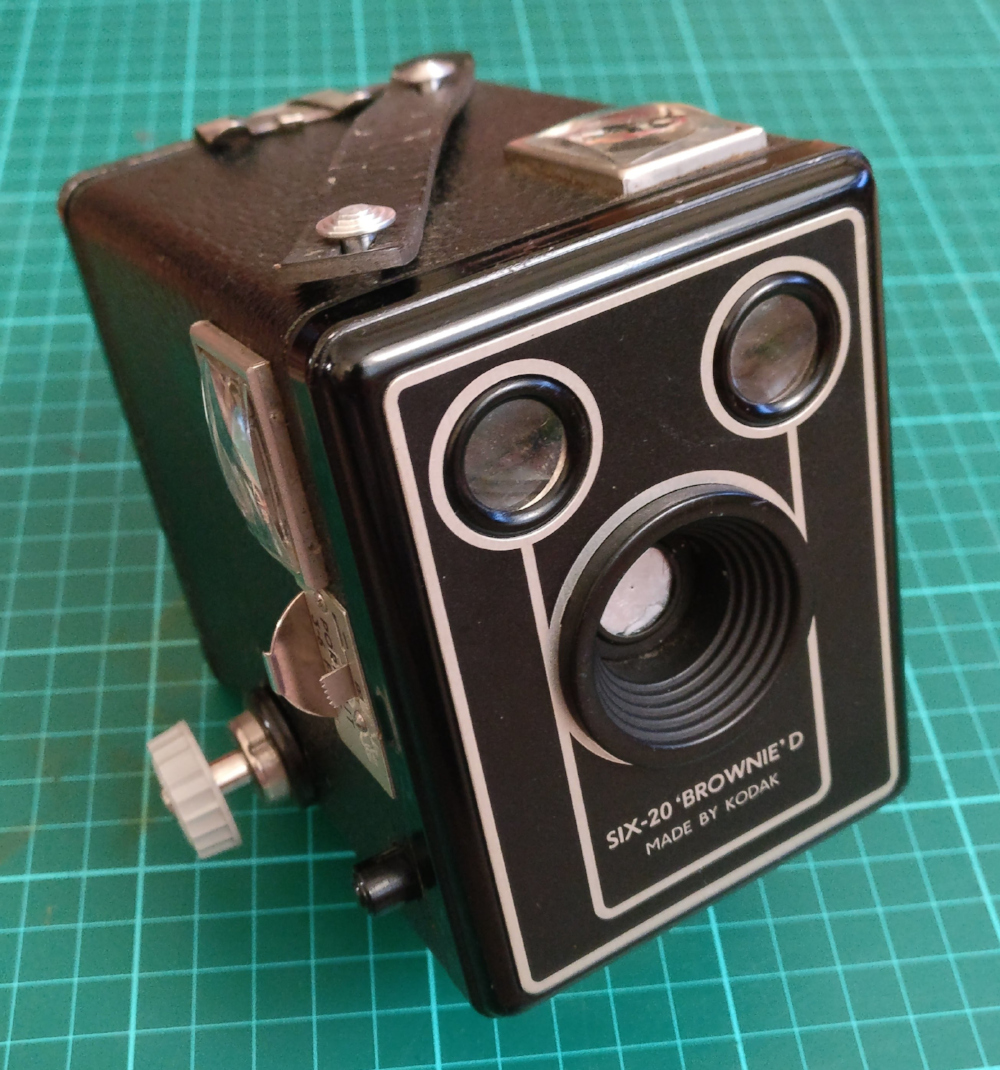
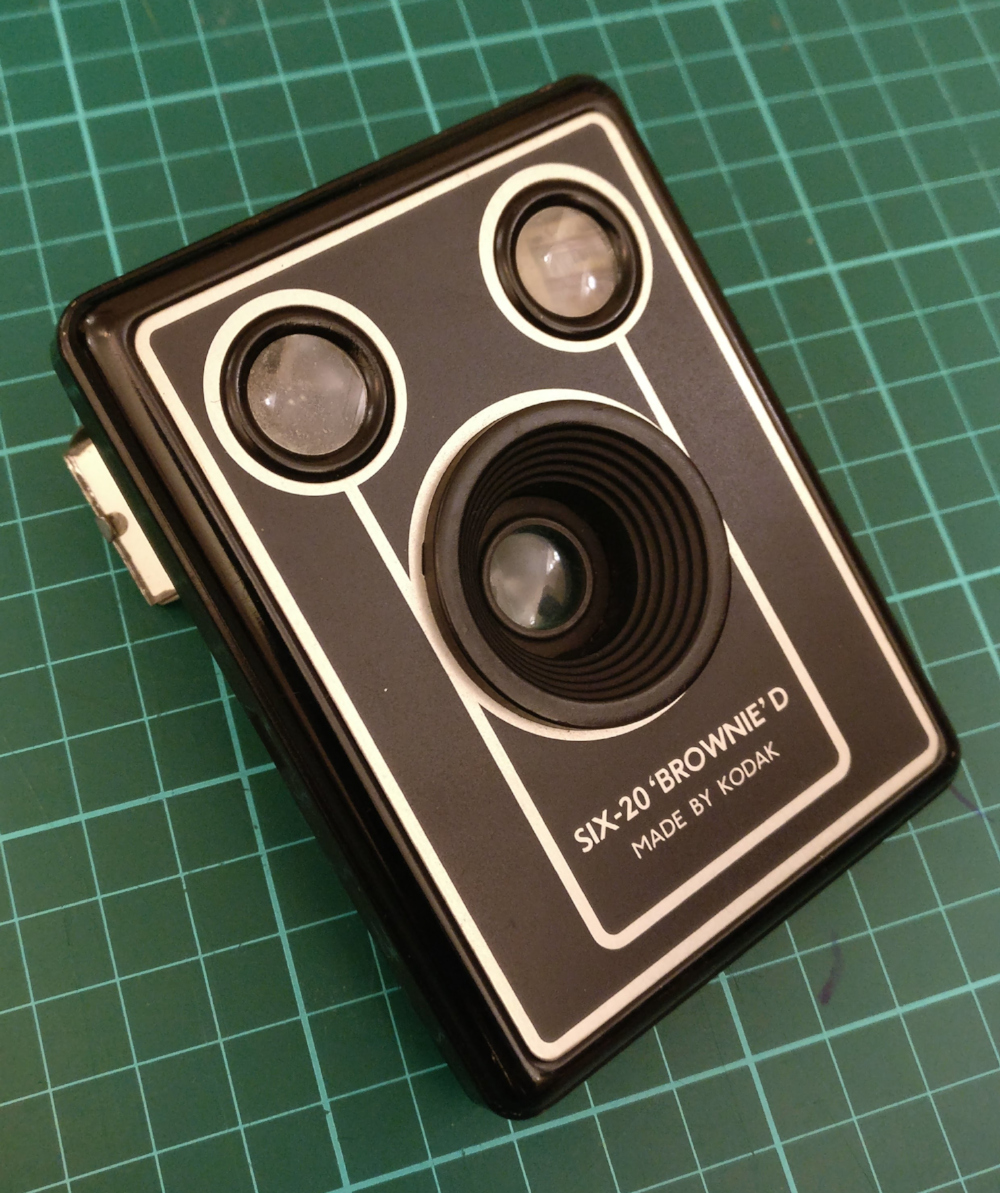
The fully converted camera, outwardly identical except for the pinhole plate and tripod nut
Box Brownies used a variety of film formats depending on vintage and camera model. I’ve seen at least 620, 616, 120 and 127 format films. Ones taking 120 film are the most desirable for the obvious reason that the film is still available to buy. For 620 film, you can respool 120 film onto 620 spindles as the film is exactly the same size. Kodak simply made 620 spindles 1mm different in size to force you to buy film from Kodak only 🙁 You’ll often find one 620 spindle inside the camera, and at the price Brownies go for you might try your luck buying another just to get a second spindle. 616 format is more tedious to deal with, as it is physically wider than 120 film. You can still try respooling 120 film onto 616 reels, or it is also possible to find 3d printed adapters that make 120 film directly usable. For 127 format film you would have to respool 35mm film.