Regulus (α Leonis)
Regulus is a camera exposing quarter size vintage glass plates inside a hardcover book whose pages have been carved out to form a hollow.
- Motivation
- Design
- Gallery
Design
The Parts
The most important component of this camera is of course the book itself. The camera is intended to shoot onto quarter size glass plates which are 3+1/4″ by 4+1/4″ in size, while the plate holders themselves are obviously slightly larger approximately 3+1/2″ by 5+1/4″. The intention is for the plate to be in landscape orientation, inserted from the side of the plate. So the chosen book clearly has to have a width of at least 5+1/4″. The thickness of the book is quite important too, as this will directly determine the distance between the glass plate the pinhole, and thus the focal length and f-stop. A hard cover book is highly desirable to ensure a more robust overall design. The best thing to do is find a local second hand bookshop and browse its shelves looking for an old unloved hardback book which no one is likely to miss once it is cut up – you don’t want to be cutting up a priceless first edition of anything ! I found a copy of “Pictorial Cyclopedia of Photography” published by “Focal Press” in 1974. This measured 5+1/2″ by 9″ and was 1+3/4″ thick (700 pages!).
The second most important component is the glass plate holder which will ultimately slide into the back of the book to hold the glass plate in position, and protect it from light when inserted/removed to/from the camera. I had 12 of these holders already, acquired along with a camera last year. The aim is to keep things as simple as possible, ideally using nothing more than the book and the glass plate holder, but to ensure the camera is reasonably light tight, the plate holder needs to be attached to the camera body (aka book) securely. For this reason it was decided to get a strip of aluminium 2mm thick, 15mm wide and 1000mm long from the local builders merchants. Fixing of the aluminium to the book would ultimately require some M4 machine screws and M4 rod/stud connectors. Finally, as insurance against light leaks, a sheet of self-adhesive black felt.
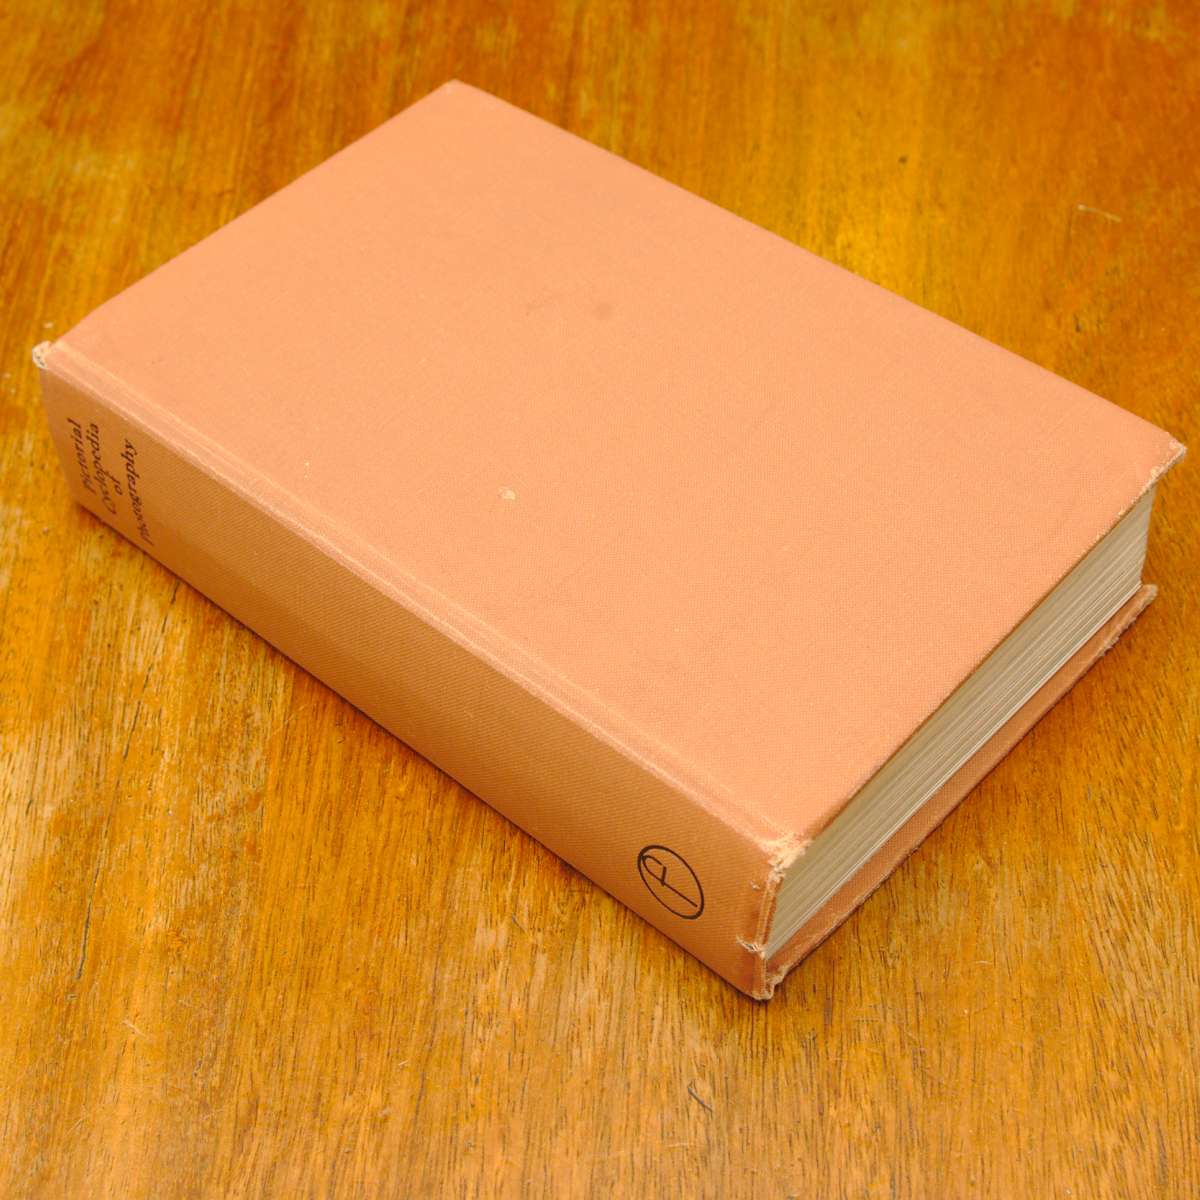
The original book
Preparing the book
The pinhole aperture plate will be positioned a few pages inside the front cover of the book, while the glass plate will be a few pages inside the back cover. Obviously to allow light from the pinhole to reach the glass plate it is necessary to carve out the pages in between. It isn’t simply a matter of carving through the pages of the book in one go, there needs to be a series of distinct cut-outs made in the pages. At the back of the book the cut-out must be large enough to allow light to expose the full area of the glass plate, while at the front of the book the cut-out must be quite small, allowing a metal plate containing the pinhole to be fixed in place. There also need to be a couple of extra regions cut to hold metal strips which will be used to fasten the glass plate holder in place. The distinct cut-out regions are shown in the diagram below:
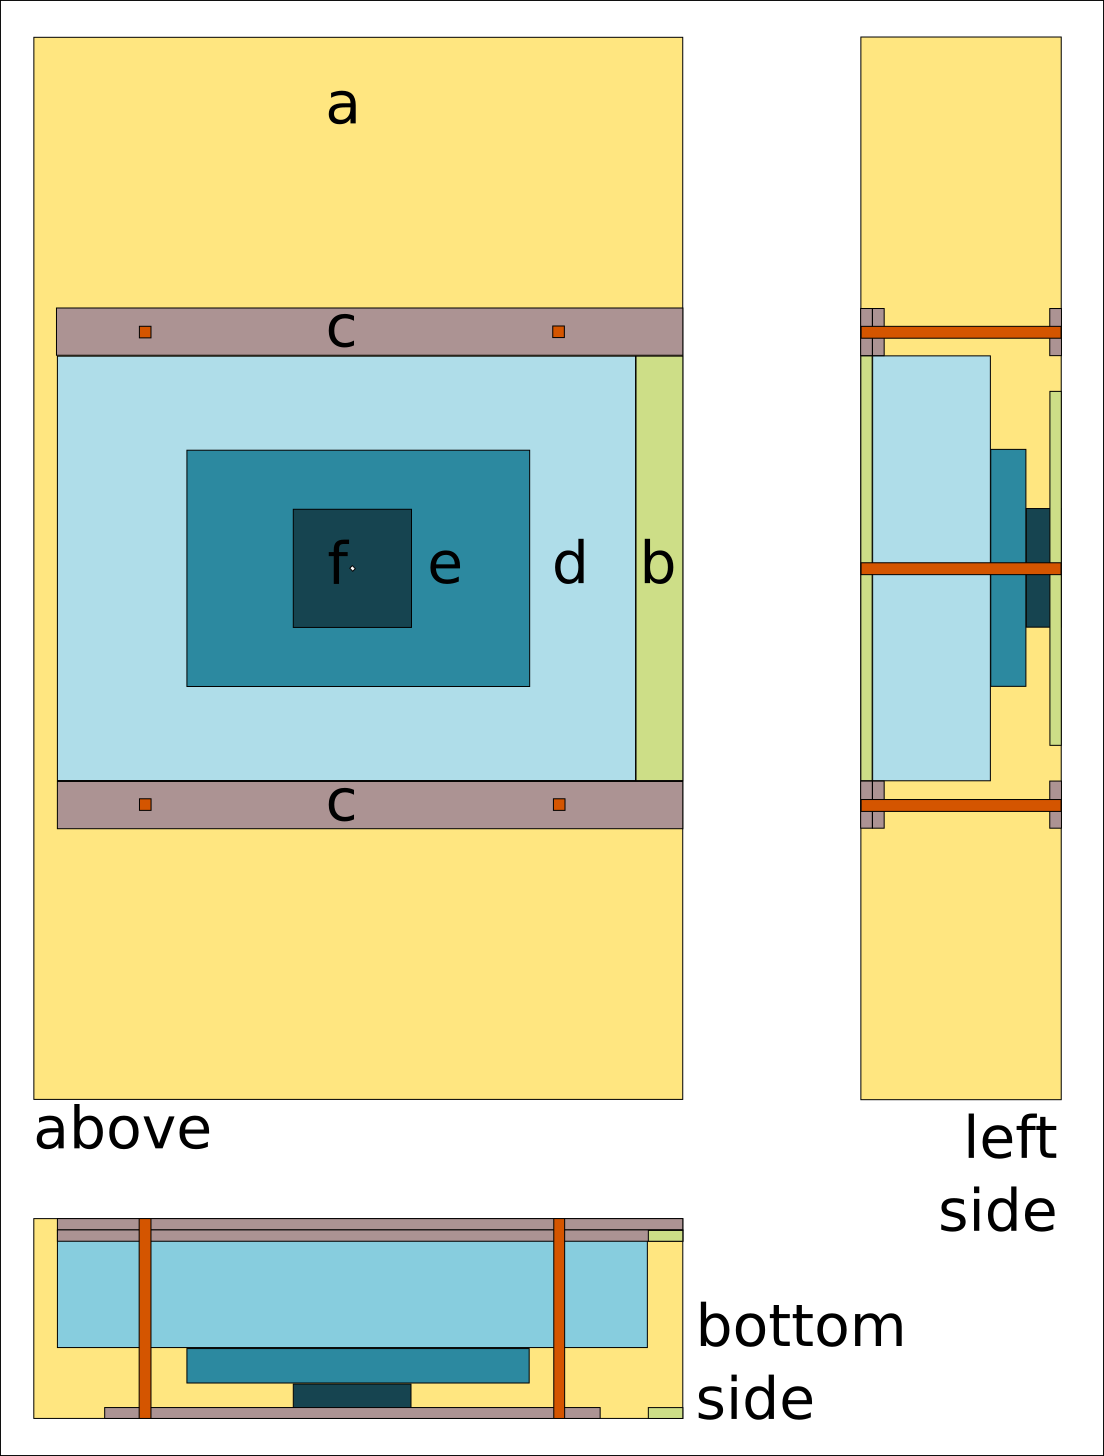
Diagram of the book showing regions to be cut out. Yellow indicates original pages of the book. The three shades of blue are the main cut-out areas which allow light from the pinhole to the glass plate. The green/purple areas are cut-out areas for the metal strips that will accept the glass plate holder. The red shows holes to be drilled for fastening the metal strips
When cutting the pages a very sharp scalpel or stanley knife is required, and even then it is only practical to cut through less than 10 pages at a time. The book is many 100’s of pages long, so this takes some time and effort. In the diagram the yellow region (a) represents the original pages of the book which will be left in place. The first step is to cut out a strip (b) on the left hand side of the book to hold a metal strip. This is mostly to provide some strength to the side of the book, since the glass plate will be sliding over this part when inserted/removed and would easily rip bare pages. Either side of the main cut-out will be two pairs of metal strips (c) separated by 1/2mm (say 10 pages). The glass plate holder will slide between these two strips so these need to be accurate cuts. With these small cut-outs done, it is possible to proceed with the main cuts, carving out the center of the book in regions (d), (e) and (f), getting gradually smaller towards the front of the book. The final region (f) will have the pinhole plate attached, so should be about 1cm x 1cm in size.
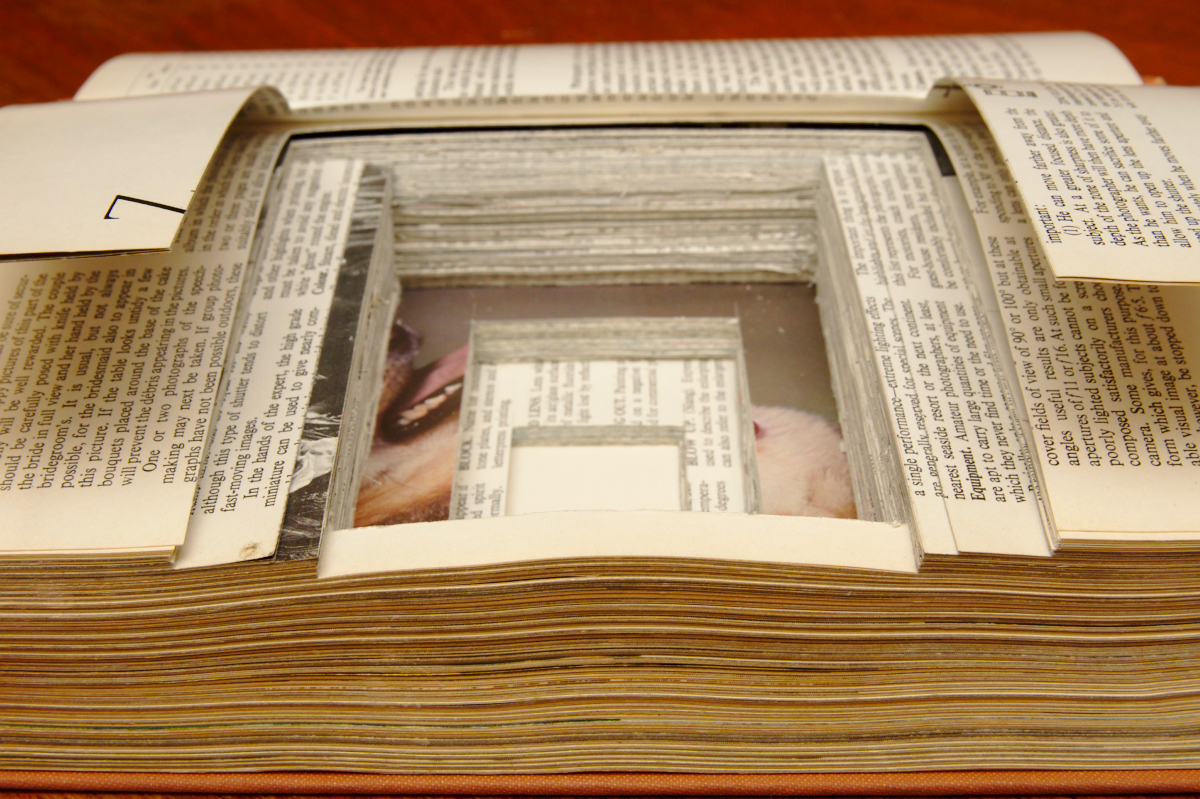
The back of the book, showing the large cavity sized for the glass plate holder, and two narrow strips either side which will hold metal strips.
The final region (f), at the front of the book, will have the pinhole plate attached, so should be about 1cm x 1cm in size.

The front of the book, showing the small cut out over which the pinhole plate will be placed
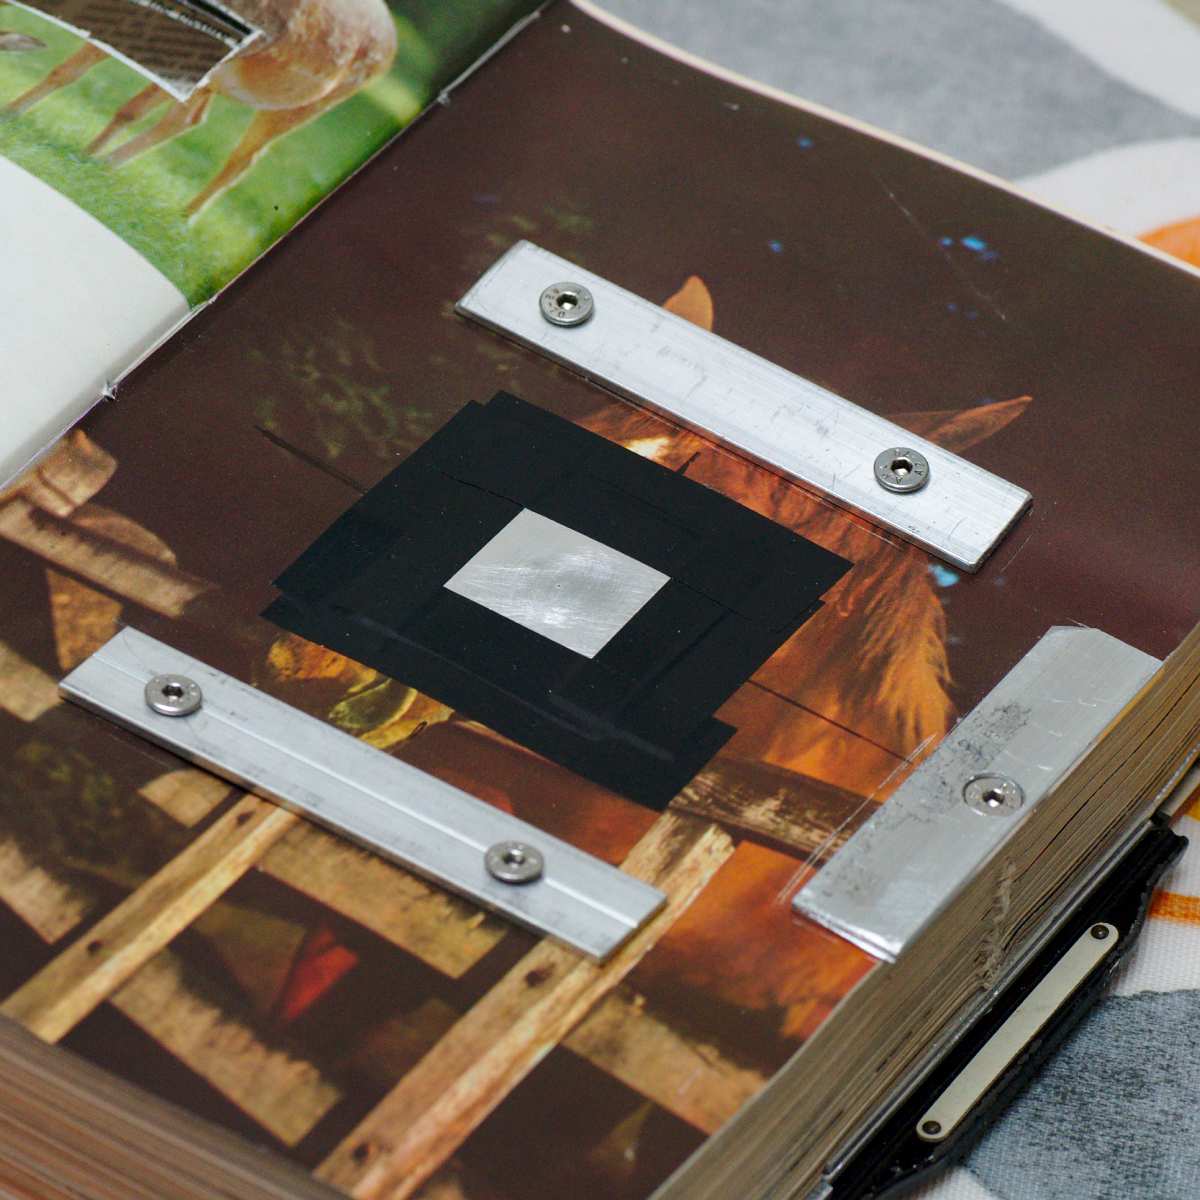
With the main cut-outs all done, it is time to add the metal strips between which the glass plate holder will slide. Each side will require two strips, with about 10 pages sandwiched between them to form a narrow gap to accept the glass plate holder. The gap should be only just large enough, so the glass plate holder is a snug fit. The metal strips will be held in place with a pair of machine screws and some internally threaded connecting rods that go all the way through the book. A regular drill should be used to make the holes to accept the screws and connecting rods. When drilling through the book, the pages should be firmly clamped together to avoid slippage / misalignment of pages.
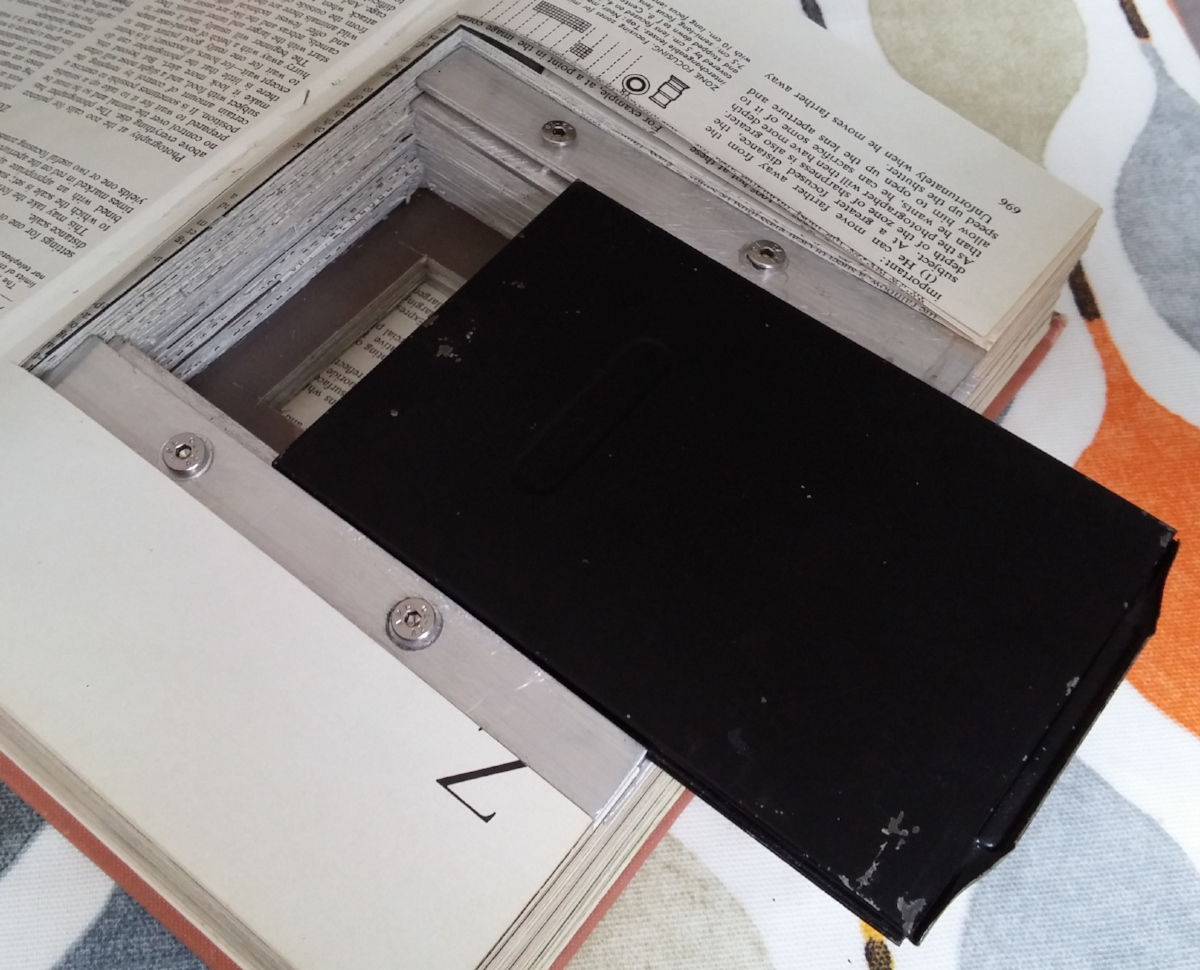
The back of the book, showing metal strips attached, allowing the glass plate holder to slide into position
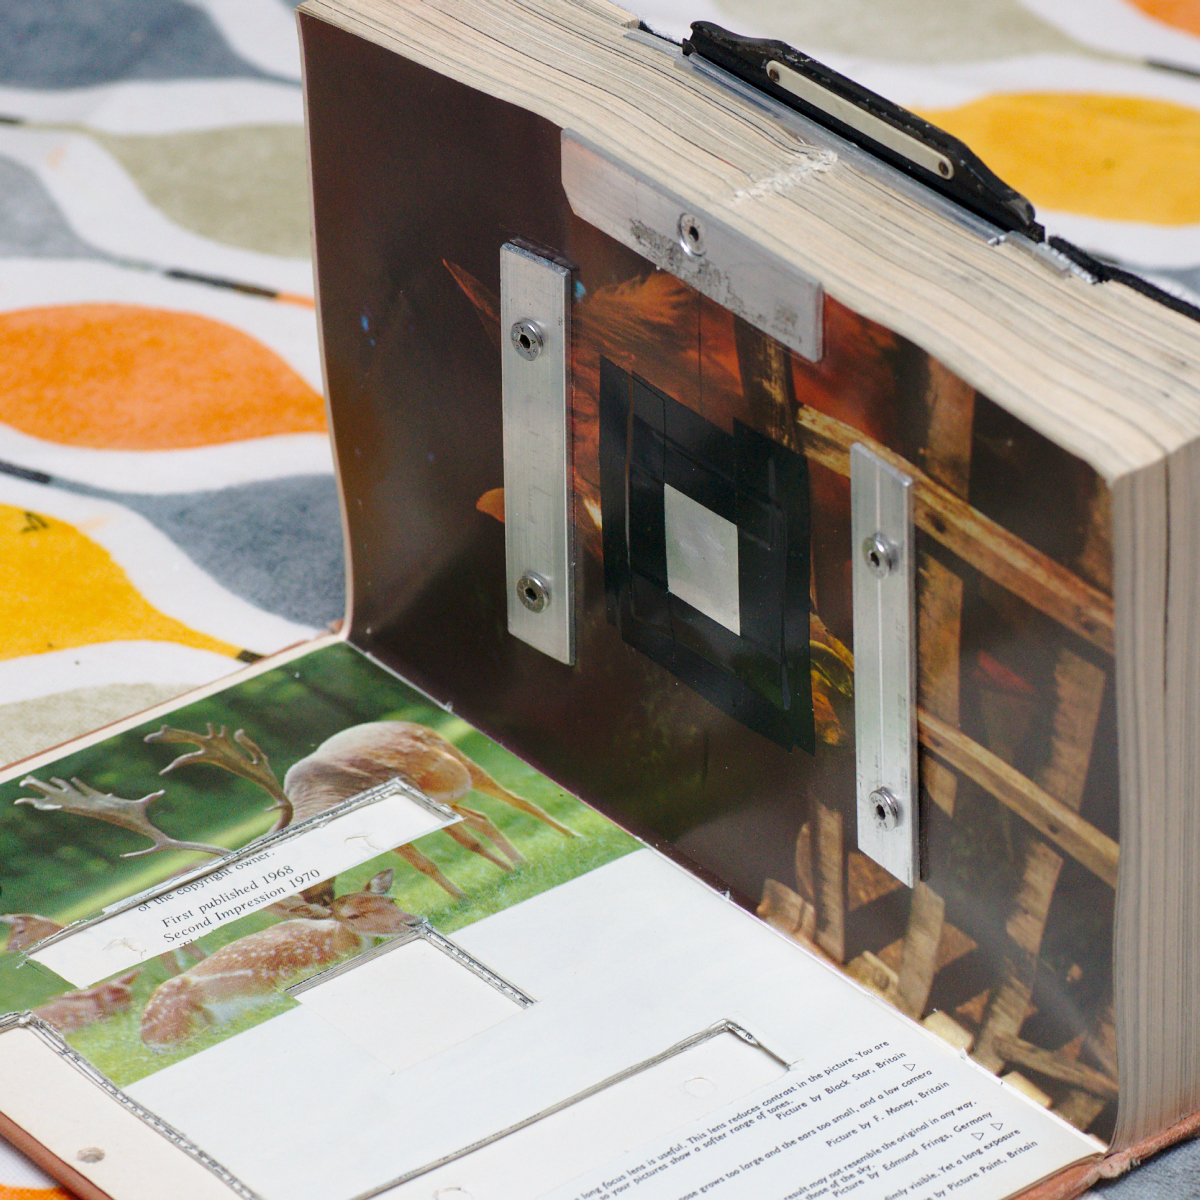
At the front of the book a further set of plates will be positioned and further machine screws used to attach to the connecting rods inserted from the back. In this pages all the pages of the book get firmly clamped together which will serve to avoid light leaks between the otherwise loose pages. A piece of thin metal such as a flattened drinks can or equivalent will serve as a plate in which a pinhole will be made. This can simply be taped into position on the front of the book taking care to center it over the glass plate.
The front of the book showing further metal plates which are bolted to those at the back
The book is probably light tight at this point, but for added protection, a sheet of self-adhesive black felt can be cut up to line the interior of the cavity (to prevent reflections) and the edges as a final light barrier.
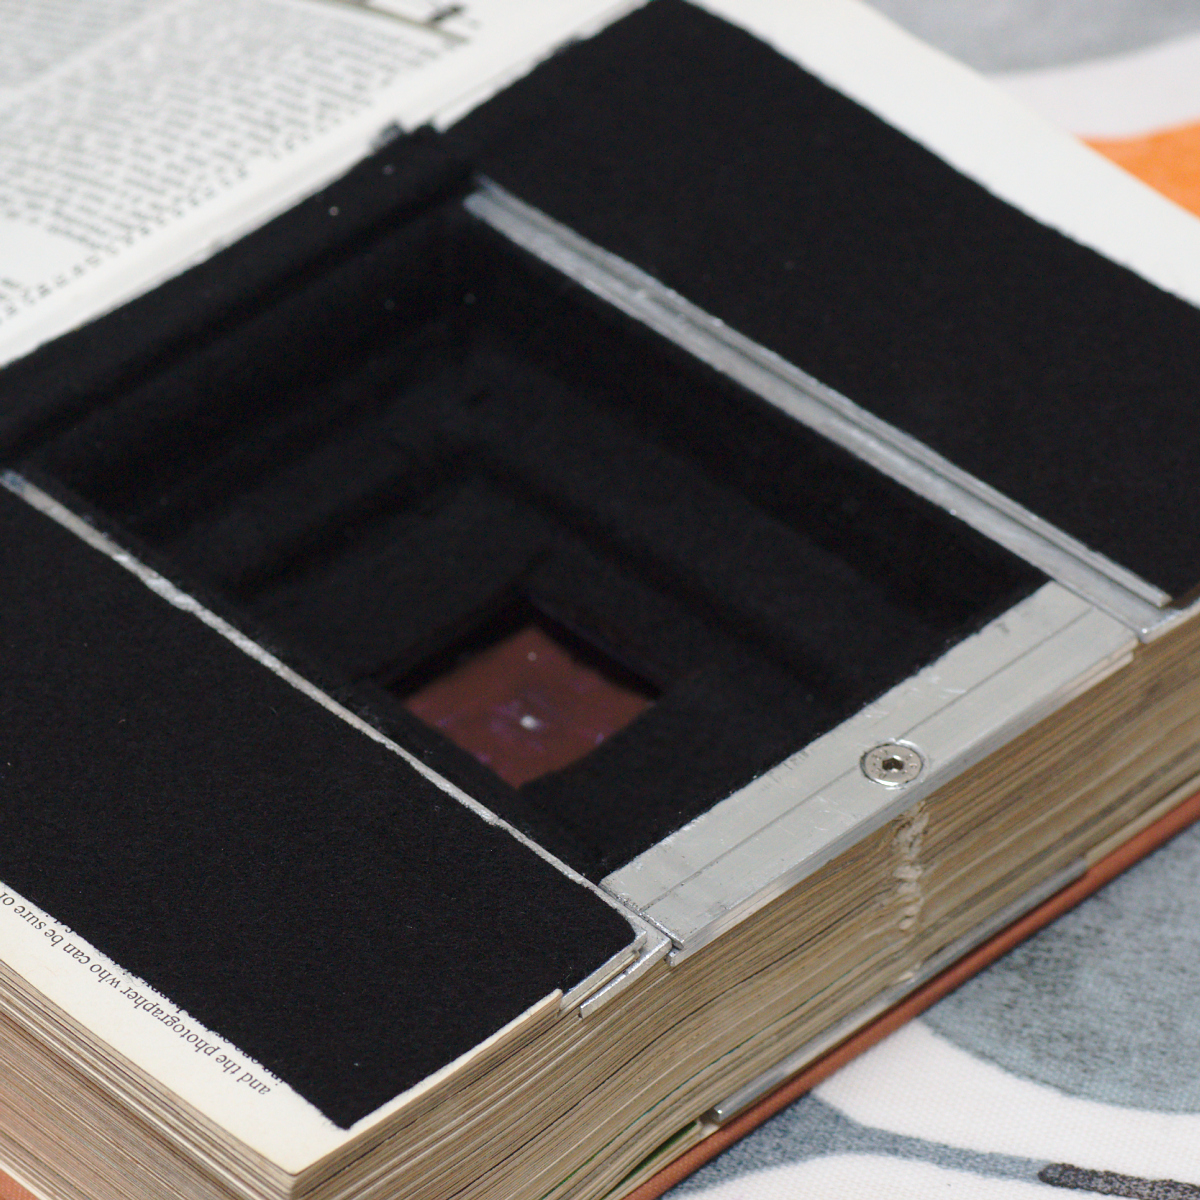
The back of the book, showing self-adhesive black felt lining the cavity and covering the edges.
At this point the construction is complete and from the outside there should be little-to-no sign that you have anything other than a regular hardcover book. Depending on the precise size of the book, at most there might be a small part of the glass plate holder poking out at the side. Only when opening the front or back covers will the book’s secret be revealing exposing the pinhole in the front, or the glass plate in the back. For shooting the book naturally wants to stand on its side, thus taking pictures in portrait orientation on the glass plate:
The finished camera positioned on its side, with cover open in order to take an exposure
When taking a photo one would start with the front cover closed, and pull out the dark slide from the glass plate holder. Then place the book on a suitable surface, pointing at the subject to be photographed. Finally allow the front cover to fall open, revealing the pinhole. Vintage glass plates will have lost a huge amount of sensitivity, so may be as low as ISO 10 or less. With a tiny pinhole aperture, the expose times are thus going to be very long. This means that the process of opening/closing the book cover to take a photo is not really time critical unless there is a very bright light source in view.